F-350 Box-Art Build - Page 2
Home
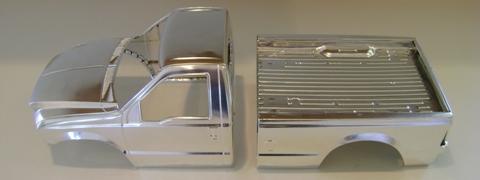
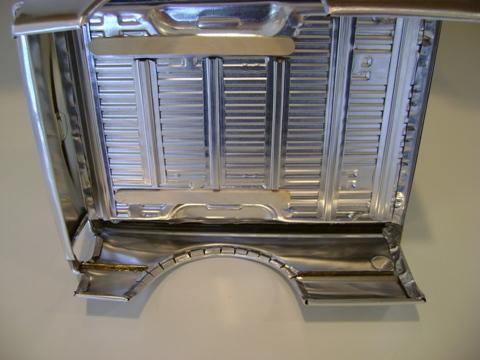
The starting point is a new F-350 body made with the newly available optional 0.008" aluminum – the thickest yet! Also new with the F-350 body is areas of the cab were redesigned for greater compatibility with the Tamiya window piece – the rear cab piece and roof panel are now a single stronger piece, and the area below the rear window now follows the window piece better.
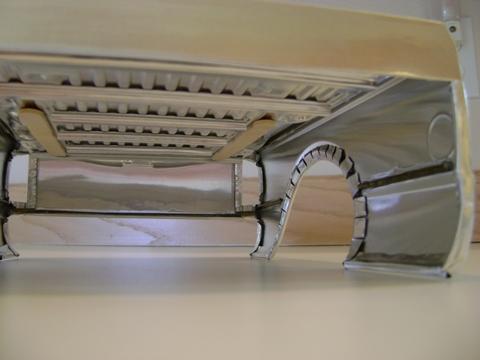
Most of the aluminum bodies have no additional reinforcement installed as shipped; with the exception of the vintage Blackfoot bed cover, Willy's Flat Fender hood, Land Rover roof and Lunchbox roof – those come with aluminum channel supports made of the same aluminum as the bodies. Basic reinforcing material is, however, included with each body, or you can choose the optional premium truck reinforcing kit.

For this F-350 body I am using the
optional premium truck reinforcing kit as well as doing some reinforcing using
metal coat hanger, most of the bodies I see out there have some additional
reinforcement, either glued to the inside of the body or an external cage.
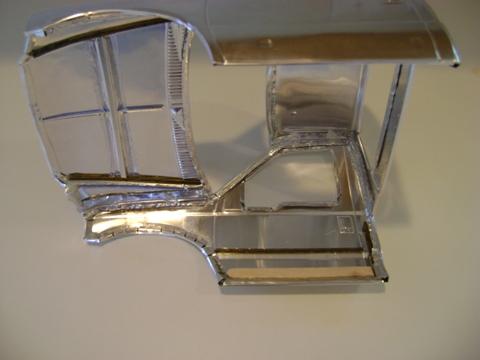
All the reinforcing may not be
obvious, the next picture shows where it is. I did not add reinforcement near
the base of the windshield or front of the hood because these areas will be
stiffened by the window and grille respectively. Also, the A and B pillars and
roof will be supported by the window piece so I did not reinforce in those areas
either.
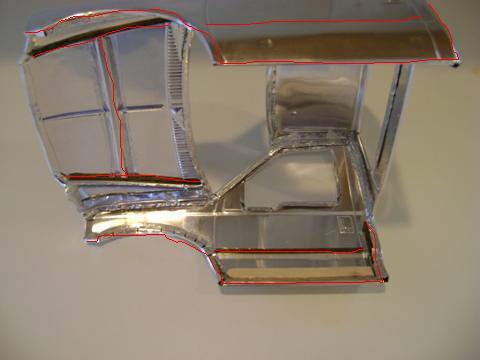
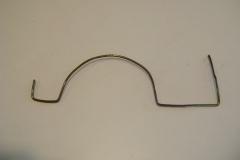
When choosing where to reinforce, I was considering areas that were most vulnerable and where I could follow the body lines of the F-350. I didn’t want to make it indestructible though, after all one of the greatest features of these bodies is the scale factor of realistic body damage! I used metal coat hanger mostly, it is easy to form and cheap! I also used the included craft sticks as backing where I would make holes for mounting the body.

When forming and gluing the coat hanger, I didn’t want it to fit the body lines
perfectly, this would still allow realistic body damage in the voids of the
areas that were reinforced; plus I probably couldn’t have formed it good enough
to fit perfect anyway, lol. Some of the pieces of coat hanger were able to be
tucked in to the folds of metal by gently lifting the folds up to fit the formed
coat hanger pieces, gluing in and gently pressing the folds back down.

Even with the reinforcing, look at
all that sheet metal just waiting for contact from an unsuspecting rock out on
the trail, I can't wait!